The Wild Bunch Etch A Sketch Card combines adorable animal images with a nostalgic design that is sure to make people smile. Ever since I first saw the Wild Bunch stamp set I knew I wanted to recreate an Etch A Sketch inspired card I made years ago. It took me a while to get around to it, but I finally did!
If you'd like to see the original inspiration, you can find it here.
One of the things I love about this project is how simple it is. There is no coloring required and no designer paper involved. With just a little embossing and a bit of die cutting, the card comes together quickly while still making a big impact.
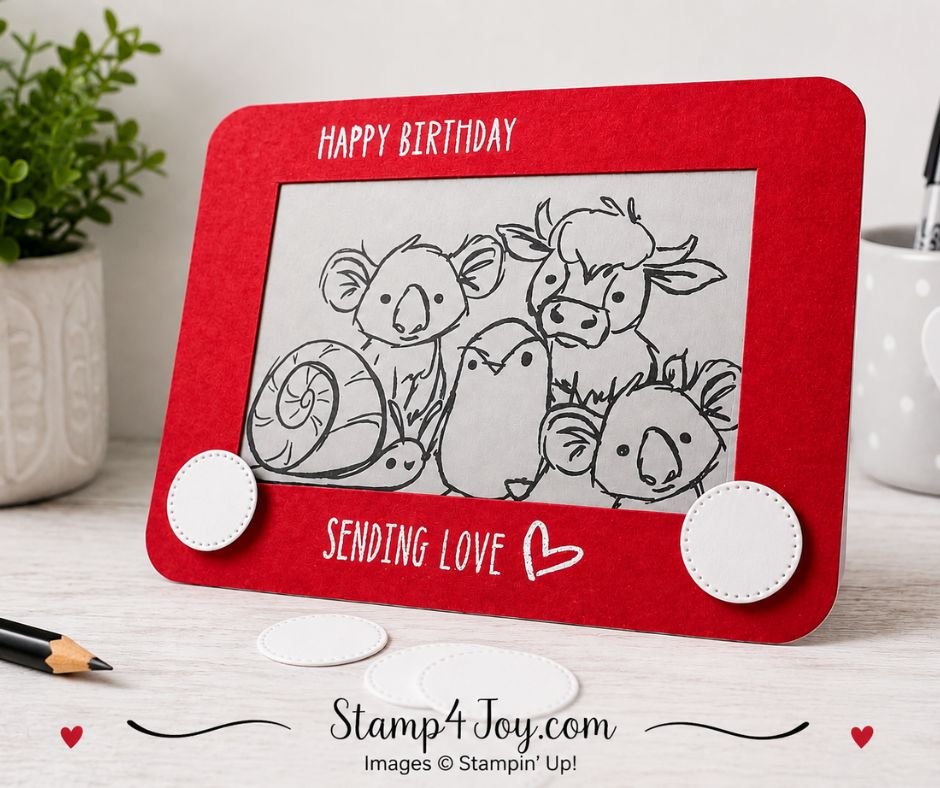
I stamped the animals onto a piece of Smoky Slate cardstock cut to 4-1/2″ x 3-1/4″. To create the Etch A Sketch frame, I started with a piece of Real Red cardstock measuring 4-1/4″ x 5-1/2″. After cutting the center opening, I left a 3/4″ frame all the way around and rounded the corners of both the frame and the Basic White card base.
Creating the Classic Etch A Sketch Look
The greeting was one of my favorite parts of this card. I used my Stampin' Positioner to arrange all of the stamps exactly where I wanted them and then stamped everything at once using VersaMark Ink. After heat embossing with White Embossing Powder, the frame really started to look like the classic toy.
Well… almost.
The first few letters in “Happy” didn't emboss quite as well as I had hoped. Rather than starting over, I grabbed one of the new White Gel Pens and traced over the letters. It blended right in and saved me from remaking the entire piece. Sometimes those little crafting fixes end up being the best solutions!
To complete the Etch A Sketch look I die cut two small Basic White circles using the Stylish Shapes Dies and attached them as the knobs. Those simple circles instantly transformed the card from a stamped project into a recognizable Etch A Sketch design.
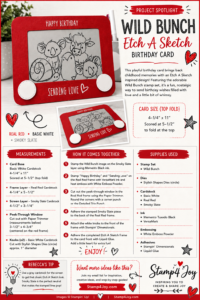
Download the Free Project Spotlight
I've created a printable Project Spotlight for this card that includes measurements, supplies, basic instructions, and my favorite tip for fixing embossing mishaps. It's perfect for saving to your crafting files or printing for future reference.
Note: There is an error for the card base. It is 5-1/2″ x 8-1/4, scored at 4-1/4″ to make the base 5-1/2″ x 4-1/4″.
Try This Idea With Other Stamp Sets
Unfortunately, the Wild Bunch Stamp Set has sold out, but don't let that stop you from trying this idea!
The fun part of this project is really the Etch A Sketch design itself. Almost any stamp set with several images can work inside the “screen.” Try it with other animal stamps, holiday images, birthday characters, or even floral designs.
The bright red frame and simple black-line images are what make the card instantly recognizable as an Etch A Sketch, so have fun experimenting with stamps you already own.
A Simple Card with Lots of Personality
The black-and-white images against the bright red frame remind me so much of the original toy. The Wild Bunch animals add plenty of personality and make the card feel playful and fun.
This design would also be easy to adapt with other stamp sets. Just imagine all the different scenes you could create inside the frame!
I'd love to hear what you think. Does this card bring back memories of drawing on an Etch A Sketch? Please leave a comment below and let me know!

14 Responses
What a fun card! I have 6 great-grandsons from 5years old to 9 years old. They are going to love this – as will their mothers! Thank you so much for the tutorial and the idea! I love it!
That’s great, Bette. Be sure to note the correction in the blog post. Enjoy!
I love this card, thanks for sharing
So glad you like it, Linda!
Can you tell me how you stamped the animals? I can see that they all overlap, but can not figure it out!! 🤣 thanks
Sandy, you’ll want to make a mask of the animals you want in front. I usually use a larger Post-it Note, stamp the animal on it (making sure the sticky part is behind usually the top), and cut it out. Then you stamp the animal(s) you want in front on your card and cover them with the masks you made before stamping the animals you want behind. I hope that makes sense. Let me know if you have any other questions.
Wouldn’t the cardstock need to be 8 1/2” X 5 1/2” scored at 4 1/4”? I love this card, it looks just like an etch-a-sketch! Thanks for sharing 🙂
Sherry Broussard
(fellow demo)
Thank you, I’m so glad you like it. Yes, I put an updated correction for the cardstock size earlier in the blog post, but thanks for letting me know in case I missed it.
No Wild Bunch, of course, so I used various animals from different stamp sets. Also adhered a sheet of acetate to the inside of the frame and popped it up with dimentionals. Never would have come up with this idea myself! Thank you for your creativity!
That’s great, it can obviously be used with other animals/things. I think my original card I used a window sheet over the top, too, but it’s so long ago I really don’t remember. I’d love to see the card you came up with!
I ABSOLUTELY LOVED this card idea! Thank you for sharing.
You’re so welcome. Thanks so much.
Such an Adorable Card 😍😍
Thanks so much, Tina.