Quick and Easy Handmade Floral Thank You Card Idea
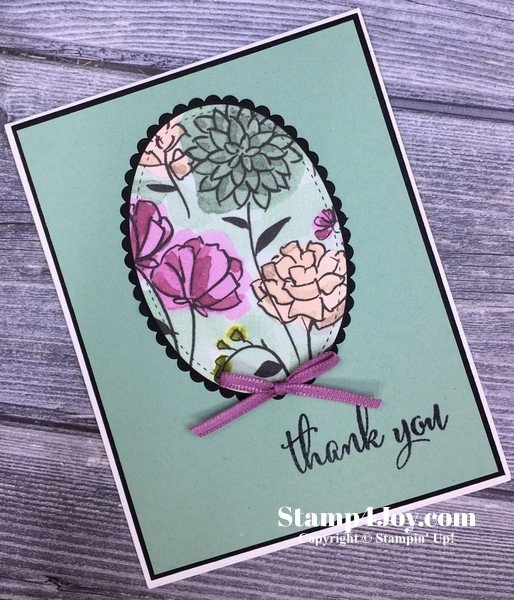
 Give this quick and easy handmade floral thank you card a try with the new Share What You Love Suite.
Read on to get your FREE handmade card tutorial.
A paper pattern design from the Share What You Love Specialty Designer Paper collection was quickly cut into an oval shape using the Big Shot and my Stitched Shapes Framelits dies and then mounted on a scalloped Basic Black oval cut out with the Layering Ovals Framelits.
Mount this focal point on the front of your card, stamp your greeting in the lower right corner, and you're just about all done! The only thing left to add is the ribbon.
The Share What You Love Suite includes a beautiful Rich Razzleberry Velvet Ribbon, but instead I decided to pull out my new 1/8″ Whisper White Sheer Ribbon. It was easy to create some Rich Razzleberry ribbon (or any color for that matter) by using my Rich Razzleberry Stampin' Blends Combo Pack. There's no need to buy ribbon in a variety of colors, just create your own custom ribbon!
I used the lighter shade from the pack, but the darker one would have worked beautifully, too! Just slide the brush along the ribbon. You only need to color one side because the ink will float through to the other side. And it dries pretty quickly, too, so you won't have to wait long to use it on your project. Tie the ribbon into a dainty little bow and attach it to the bottom of the layered floral oval with a Glue Dot, and you have completed this simple and cute card in no time!


