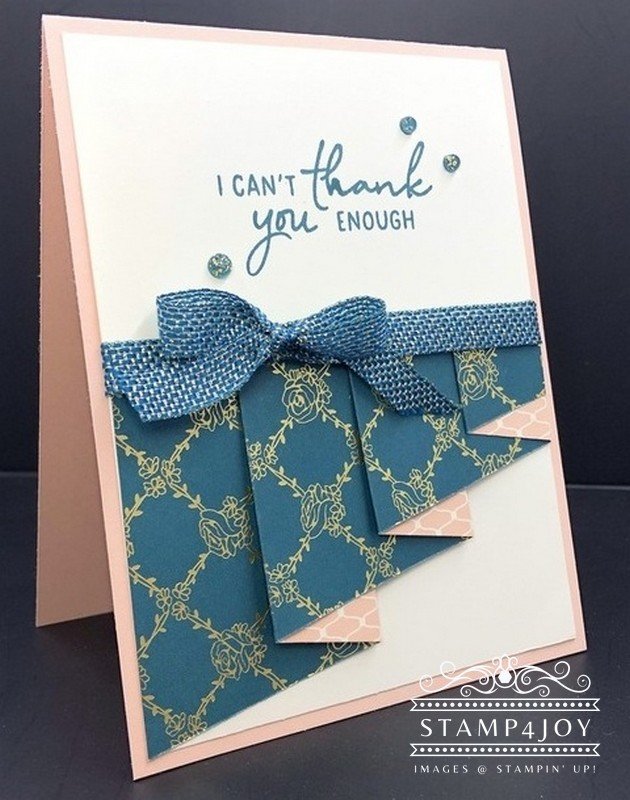
Who doesn't love making fun fold cards? I know I do. Sometimes they seem so complicated. Sometimes they are! This drapery fold card idea, however, is super easy!
Before I get into the actual card, can I just say how much I LOVE the Pretty Peacock & Gold Ribbon and Petal Pink & Pretty Peacock Foiled Gems? I admit it, I wasn't a fan when I was looking at them in the catalog. The only reason I ordered them was to do my product shares. And I am so glad I did because they are GORGEOUS! That ribbon is so supple. I used to make all my clothes, and I could envision a beautiful evening dress made out of that material… so luxurious!
Anyway, back to our regularly scheduled programming. 🙂
To make the drapery fold card I took a pattern that didn't have a particular direction, and cut it 3-3/4″ x 10″. On the short sides I marked with a pen (it's erasable!) up 3/4″ on one side and then marked at 3/4″ on the opposing edge on the opposite side. Then I made a diagonal cut from one mark to the other.
Beginning on the fatter edge I scored in at 2″, then 3″, 5″, 6″, 8″, and 9″. You can fold them as you see on the card, and then glue in place where you need to. The soft Petal Pink pattern on the back side of the designer paper adds a nice touch. Wasn't that super easy!?
I glued that to a 4″ x 5-1'4″ sheet of Very Vanilla cardstock. I then wrapped some of the ribbon around it and added a soft bow.
The thank you sentiment came from the Perennial Postage stamp set and was stamped in Pretty Peacock to match the designer paper and ribbon. I then layered this onto a Petal Pink card base.
And finally I added those beautiful gems around the greeting. See! Aren't these fun fold cards easy to make?
Check out this torn effect card making techinque.


