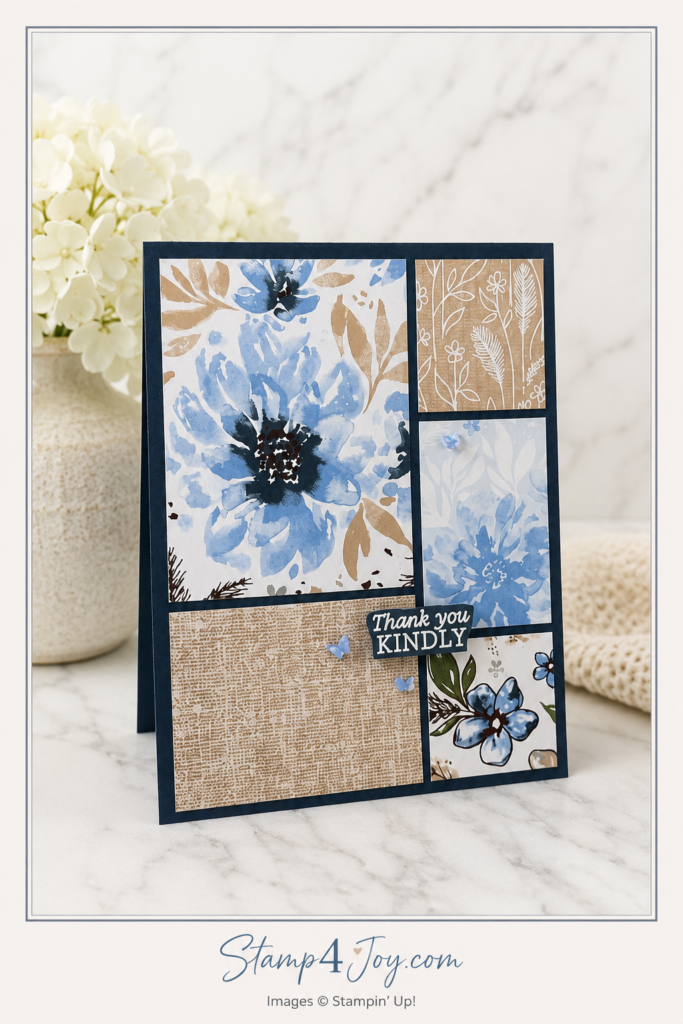
Scrap Card Layout with Delicate Dreams Paper Scraps
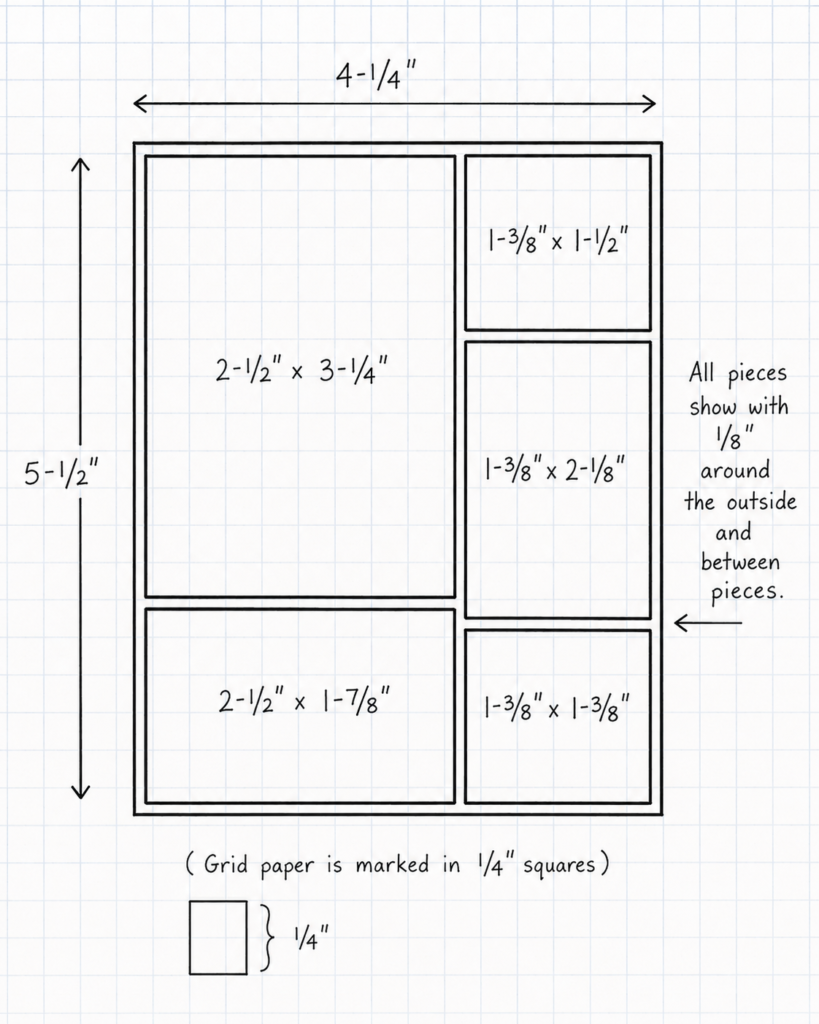
This scrap card layout started with a piece of grid paper and a pen. Before I cut a single piece of designer paper I sketched the layout to help me visualize the finished card and work out the measurements.
My grid paper is marked in 1/4″ squares, which makes planning designs much easier. Instead of guessing where each panel should go, I can quickly draw a rough layout and adjust the sizes until everything looks balanced. It's a simple trick that saves time and helps avoid wasted paper. (Remember to include the space between the paper pieces.)
You can see how I mapped out the different sections before cutting any paper. Having the layout drawn out made it easy to calculate the measurements and ensure the spacing stayed consistent throughout the design.
The pieces I used measure:
Left Side
- 2-1/2″ x 3-1/4″
- 2-1/2″ x 1-7/8″
Right Side
- 1-3/8″ x 1-1/2″
- 1-3/8″ x 2-1/8″
- 1-3/8″ x 1-3/8″
For this design I wanted to showcase several patterns from the beautiful Delicate Dreams Designer Paper collection. A patchwork-style layout seemed like the perfect way to let multiple patterns shine while still keeping the card elegant and uncluttered.
One of my favorite things about this layout is how well it works with scraps. If you've been holding onto smaller pieces of designer paper because they seemed too pretty to throw away, this design gives them a chance to become the star of the project.
Why I Love This Layout for Scrap Busting
This scrap card layout is incredibly versatile. You can recreate it with almost any coordinating paper collection, making it a great design to keep in your idea file for future projects.
For this card I selected several patterns from the paper collection and simply cut them to fit the layout. The soft blue florals paired beautifully with the neutral patterns, creating interest without overwhelming the eye.
The sentiment comes from the coordinating Delicate Whispers stamp set. I heat embossed it in white on Secret Sea cardstock, then fussy cut it before popping it up with a strip of Foam Adhesive. The raised sentiment adds just enough dimension to draw attention to the greeting.
To finish the card I added a few Hydrangea Hue butterflies from the 2026–2028 In Color Butterflies. They add a touch of movement and sparkle while tying everything together beautifully. I think these may be my favorite embellishments at this point (and I don't think I'm the only one)!
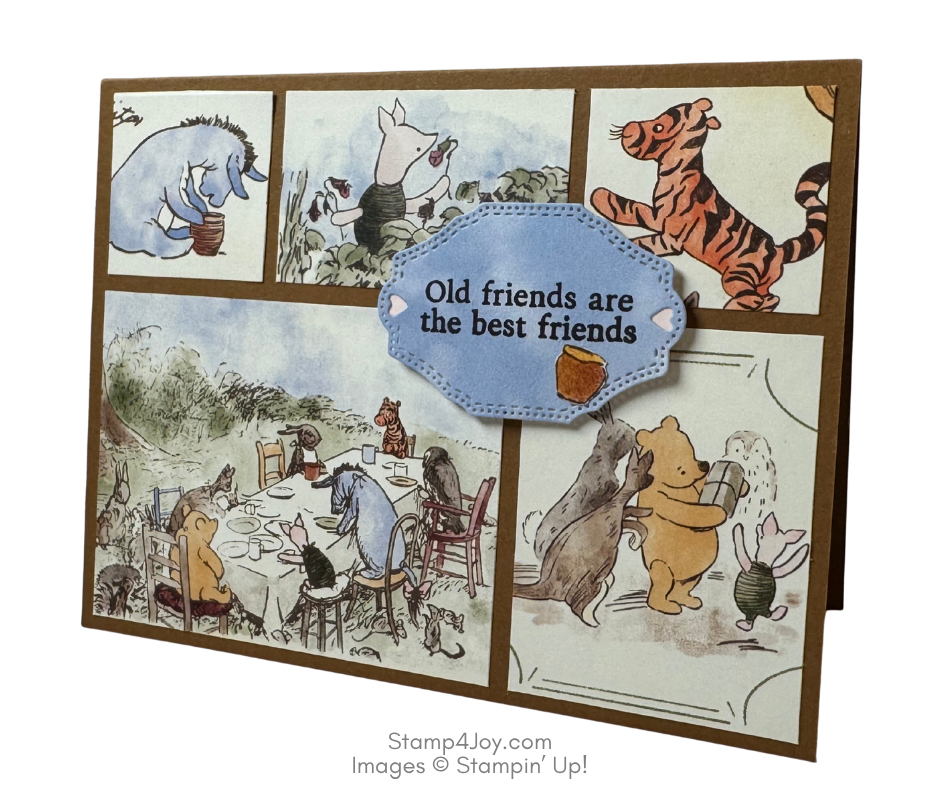
Here's another one I created using the Silly Old Bear Designer Paper, I just turned the sketch sideways.
If you're looking for a way to stretch your designer paper stash and create a card that looks more complicated than it really is, give this layout a try. You might find yourself reaching for your scraps a little more often. If you give it a try please send me a photo of your project, I'd love to see it!
Here's something else you can think about: What can you do with a circle?